Starting an organizer
Create an organizer from Collect → New organizer. The organizer starts in Draft, so you can prepare its checklist before any request reaches the client.
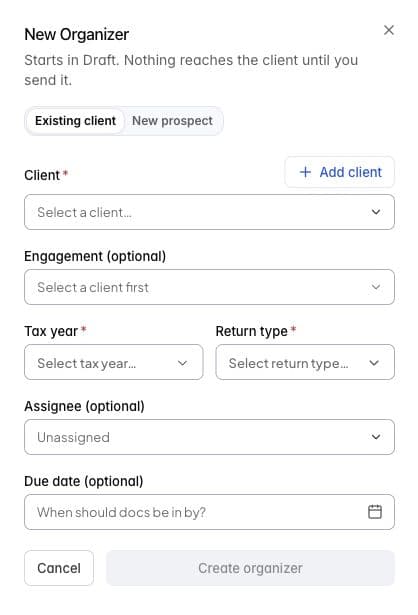
New Organizer in Tax staging, before a client is selected.
Start from an existing client
- Choose a client from Client. If you opened the form from a client row, that client is already selected.
- Choose an available Assure Pro engagement if you want to link the organizer to it. Engagements that already have an organizer are not available for another one.
- Enter the Tax year and choose a Return type.
- Optionally set Assignee and Due date.
- Click Create organizer.
The tax year must have an active organizer template. If the year is unsupported, choose a year listed by the form or ask an administrator to configure that year’s organizer template. If the client or engagement is missing, use the link to open Assure Pro, add the record there, then return to the form.
Start a prospect organizer
Choose New prospect and enter the prospect’s name, email, and entity type. Wait for the form to check whether the person already exists as a client or prospect. If it finds a match, use the existing record rather than creating a duplicate; the organizer will use that record. A prospect receives an organizer-only link; full portal access is available when the prospect converts to a client.
After creation
AssureOne opens the draft organizer. Review how the checklist should start, adjust the expected documents, and check the questionnaire before you send it. See building the checklist.
Tax reads client and engagement records from Assure Pro. Create or update those records in Assure Pro; the organizer form links to the existing record.